The dairy industry is rapidly embracing technology, and one of the biggest upgrades happening at the ground level is the installation of an Automatic Milk Collection System. For dairy cooperatives, private milk collection centers, and processing plants, automation is no longer optional — it’s essential for growth.
An Automatic Milk Collection System simplifies the entire milk procurement process. From weighing and quality testing to payment calculation and record keeping, everything becomes fast, accurate, and transparent. If you are planning to modernize your dairy operations, this guide will walk you through the complete setup process in a simple and practical way.
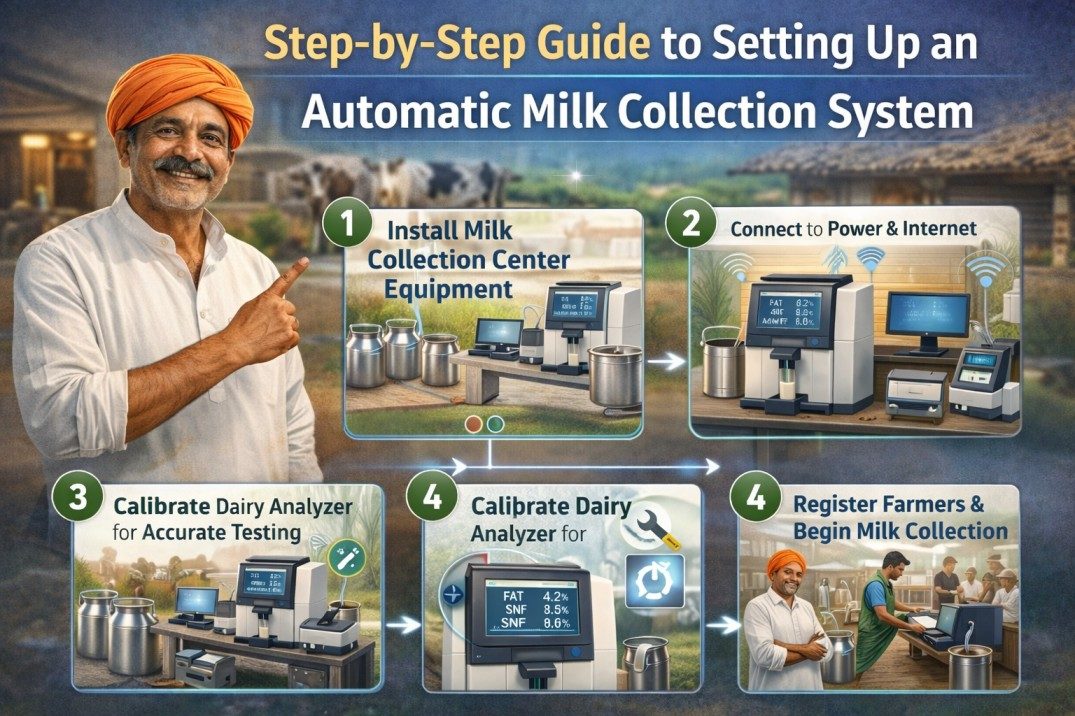
Let’s break it down step by step.
Why Upgrade to an Automated System?
Before jumping into installation, it’s important to understand why automation matters.
Traditional milk collection methods often result in:
- Manual errors in weight recording
- Fat and SNF miscalculations
- Delayed payments
- Lack of transparency
- Time-consuming paperwork
By installing an Automatic Milk Collection System, dairy operators can eliminate these issues and create a smooth, technology-driven workflow.
Step 1: Assess Your Collection Center Requirements
Every dairy setup is different. Start by evaluating your daily milk procurement volume and operational needs.
Ask yourself:
- How many farmers supply milk daily?
- What is the average daily milk volume?
- Do you operate in one village or multiple locations?
- Do you require cloud-based monitoring?
Understanding these factors helps you choose the right system capacity and features.
Step 2: Choose the Right Equipment
An automated system is a combination of multiple components working together. A well-designed Automatic Milk Collection System typically includes:
- Electronic weighing scale
- Milk analyzer (for fat and SNF testing)
- Data processing unit or computer
- Thermal printer for receipts
- Software for data management
Selecting reliable and compatible equipment is critical. Always ensure that the devices are calibrated properly and meet industry standards.
Step 3: Install the Hardware Setup
Once you have chosen the equipment, the next step is installation.
Key points to consider:
- Place the weighing scale on a stable, flat surface.
- Ensure proper electrical connections with backup power.
- Position the milk analyzer near the weighing area for smooth workflow.
- Keep all wiring safe and organized.
Professional installation ensures accurate readings and prevents future technical issues.
Step 4: Software Configuration and Integration
The software is the backbone of your Automatic Milk Collection System. It connects all devices and manages data automatically.
During setup:
- Install the official software provided by the manufacturer.
- Configure farmer profiles with unique IDs.
- Set pricing formulas based on fat and SNF content.
- Integrate the printer for instant receipt generation.
A properly configured Automatic Milk Collection System ensures that every milk entry is recorded instantly and accurately. This reduces manual work and increases efficiency from day one.
Step 5: Calibrate the System for Accuracy
Accuracy is everything in dairy collection. Calibration ensures that:
- The weighing scale measures correctly.
- The milk analyzer gives precise fat and SNF readings.
- The payment formula calculates correctly.
Before going live, test the system with sample milk batches. Compare readings with standard laboratory results if possible. This step builds confidence in the system’s reliability.
Step 6: Train the Staff Properly
Technology is only as effective as the people using it.
Provide training sessions covering:
- Operating the milk analyzer
- Entering farmer details
- Generating receipts
- Handling minor troubleshooting
- Data backup procedures
Well-trained staff can operate the system smoothly and confidently, minimizing downtime.
Step 7: Conduct Trial Runs
Before full implementation, run the system for a few days in trial mode.
During this period:
- Monitor accuracy of weight and quality results
- Check receipt printing clarity
- Verify payment calculations
- Identify technical glitches
Fix any issues immediately. A successful trial ensures smooth long-term operation.
Step 8: Implement Transparent Payment Systems
One of the biggest advantages of automation is fair and transparent payment calculation.
The system automatically calculates payment based on:
- Quantity of milk supplied
- Fat percentage
- SNF percentage
- Pre-set price formulas
Farmers receive printed receipts instantly, which builds trust and reduces disputes.
Step 9: Enable Data Backup and Cloud Monitoring
Data security is crucial in modern dairy operations.
Make sure your system supports:
- Automatic daily data backup
- Cloud storage (if available)
- Remote monitoring options
- Monthly report generation
Cloud integration allows dairy owners to track operations from multiple centers in real time.
Step 10: Maintain and Service the System Regularly
Regular maintenance keeps your system running smoothly.
Maintenance tips include:
- Periodic calibration checks
- Cleaning the milk analyzer properly
- Updating software when required
- Inspecting cables and electrical connections
Preventive maintenance reduces downtime and extends equipment lifespan.
Benefits You’ll Notice After Installation
Once fully operational, you will see clear improvements such as:
- Faster milk collection process
- Reduced waiting time for farmers
- Accurate quality testing
- Increased transparency
- Improved farmer satisfaction
- Better operational efficiency
Over time, these benefits translate into higher profitability and stronger supply chain relationships.
Common Mistakes to Avoid
When setting up your system, avoid these common errors:
- Skipping proper calibration
- Ignoring staff training
- Choosing low-quality equipment
- Failing to back up data
- Not performing regular maintenance
Avoiding these mistakes ensures long-term success.
Final Thoughts
Setting up an Automatic Milk Collection System is a smart investment for any modern dairy operation. It improves speed, transparency, accuracy, and trust across the entire milk procurement process.
From selecting the right equipment to training staff and maintaining the system, each step plays an important role. When implemented correctly, automation transforms a traditional collection center into a highly efficient and technology-driven operation.
As the dairy industry continues to grow, embracing automation today will help you stay competitive tomorrow. If you are serious about scaling your dairy business, this upgrade is not just an option — it is the future.