Window tinting is one of the best investments homeowners in San Antonio can make to reduce glare, block UV rays, and increase energy efficiency. But like any feature in your home, window film doesn’t last forever. Over time, it can bubble, peel, discolor, or become outdated. That’s when removal and replacement become necessary.
Whether you’re dealing with deteriorated film or simply want to upgrade to a more modern or energy-efficient tint, this guide will walk you through the process of removing and replacing window tint on your home’s windows — from tools and safety to the benefits of professional services.
Why Remove and Replace Window Tint?
There are several reasons homeowners in San Antonio may need to remove and replace existing window tint:
1. Aged or Failing Tint
Over time, exposure to the intense Texas sun can cause window tint to break down. Bubbling, peeling, and discoloration are common signs that the film is failing and should be removed.
2. Upgrade to Modern Films
Newer window tints offer better heat rejection, UV blocking, and even smart features like switchable opacity. Replacing old film can improve comfort and add value to your home.
3. Change of Style or Function
Some homeowners opt for different styles of tint (like frosted or decorative films) or seek films that enhance privacy without sacrificing natural light.
Tools You’ll Need for Tint Removal
Before you begin the removal process, gather the following tools:
-
Razor blade scraper or utility knife
-
Spray bottle with warm, soapy water or ammonia
-
Plastic sheeting or garbage bags
-
Heat gun or hair dryer
-
Microfiber cloths
-
Glass cleaner
-
Gloves and safety glasses (optional but recommended)
Step-by-Step Guide to Removing Window Tint
Step 1: Soften the Adhesive
Use a heat gun or hair dryer to warm the tint on the glass. Hold the heat source a few inches away and move it in circular motions. Heating the tint softens the adhesive, making it easier to peel off.
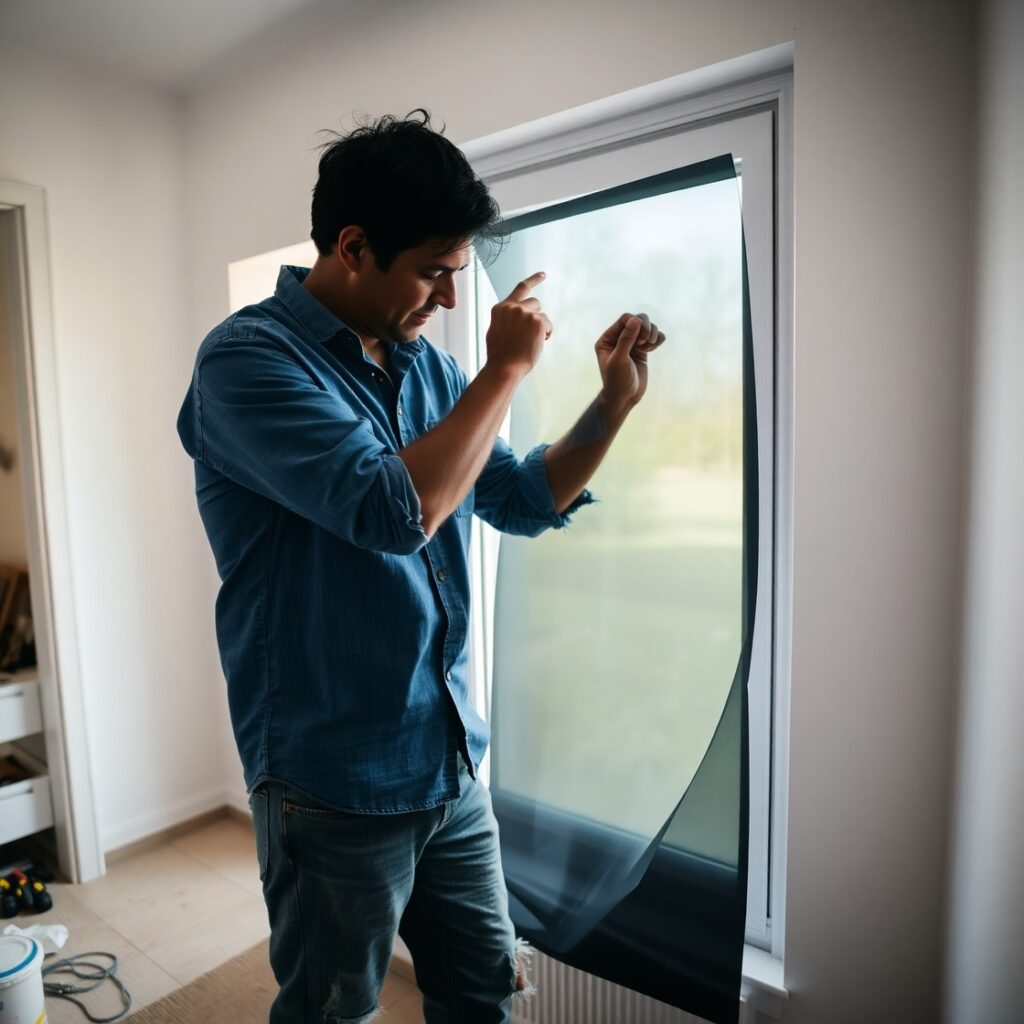
Step 2: Peel the Film
Once the film is warm, use a razor blade or your fingernail to lift a corner of the tint. Slowly and steadily peel it back at a 45-degree angle. If it tears, reheat and continue.
Step 3: Remove Residual Adhesive
After the film is removed, spray the glass with warm, soapy water or ammonia. Let it sit for a few minutes, then use the razor blade to scrape off any remaining glue. Wipe clean with a microfiber cloth.
Step 4: Final Cleaning
Finish by cleaning the window thoroughly with a glass cleaner. Make sure no adhesive residue or streaks are left behind before applying new tint.
How to Replace with New Window Tint
Installing new window tint is a precise task that requires cleanliness and careful handling to avoid bubbles and creases. Here’s how to do it:
Step 1: Measure and Cut the Film
Measure the dimensions of each window and cut the new tint slightly larger than the glass to ensure full coverage.
Step 2: Apply Application Solution
Spray the window with a tint application solution (a mix of water and a few drops of baby shampoo works well). This helps position the film.
Step 3: Apply the Film
Peel the backing off the tint film and apply the adhesive side to the glass. Start from the top and work your way down, using a squeegee to press out air bubbles and excess solution.
Step 4: Trim and Finish
Trim excess film with a utility knife, being careful not to damage the window frame or seal. Squeegee again for a smooth finish and allow the film to cure over the next few days.
Should You DIY or Hire a Professional?
While DIY window tinting can be done with the right tools and patience, many San Antonio homeowners prefer professional installation for these reasons:
-
Time savings: Pros can complete the job faster with better results.
-
Perfect fit: Professionally cut film ensures precise coverage.
-
No bubbling or peeling: Experts use tools and techniques that minimize installation flaws.
-
Warranty and quality assurance: Reputable companies provide guarantees on both product and labor.
If you’re considering a full replacement or upgrading to energy-efficient tint, consulting a professional home Window tinting service in San Antonio ensures a long-lasting and flawless finish.
Benefits of Replacing Old Tint with Modern Film
Upgrading your window film offers a wide range of benefits tailored to the San Antonio climate:
-
Better UV Protection: Modern films block up to 99% of UV rays.
-
Enhanced Energy Efficiency: Reflective or ceramic tints reduce heat gain, helping lower cooling costs.
-
Improved Aesthetics: New films offer sleek finishes and improved clarity.
-
Increased Privacy: Choose from a variety of tints that offer day-time privacy.
-
Furniture Protection: UV-blocking films prevent fading of floors, furniture, and curtains.
Final Thoughts
Removing and replacing old window tint may seem daunting, but with the right approach—or the help of a professional—you can transform your home’s comfort, efficiency, and curb appeal. Whether you’re looking to fix bubbling film, refresh the look of your windows, or upgrade to high-performance tint, the process is well worth the investment.
For homeowners in San Antonio, where sun exposure is intense year-round, keeping your windows properly tinted is more than just a cosmetic choice — it’s a smart, energy-saving decision for long-term home protection.